Poor Man’s Brisket Sandwiches
Good brisket can be expensive, and unless you’re feeding a crowd, cooking an 8- to 10-pound brisket can leave you eating the same leftovers for days. That’s where my “Poor Man’s Brisket Sandwich” comes in: I treat a much smaller chuck roast like a brisket, giving it plenty of smoke, a good bark, and a long rest before piling it onto a homemade bun. Chuck roast is also easier to work with than a whole brisket, with less trimming and sizes that make more sense for a family of three. It’s a bit of a project, but that’s exactly what I like about weekend cooking—put something on the smoker, take your time, and enjoy the payoff later.
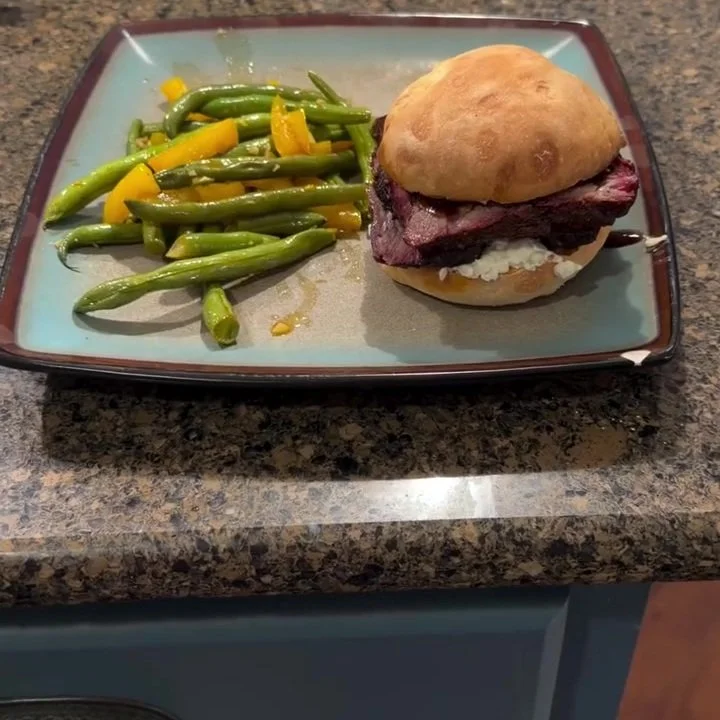
Ingredients:
Poor Man’s Brisket:
1 Chuck Roast (this one was about 2 pounds).
3-4 TBSP of Beef Tallow
BBQ Rub (I used Holy Gospel from Meat Church)
Course Salt
Course Pepper
Buns:
2 Cups All-Purpose Flour
2 TBSP Unsalted Butter, broken up into small chunks
1-2 TBSP Salt
1 TBSP Sugar
1 1/4 TSP Active Dry Yeast
3/4 cup water
Olive Oil
Cornmeal (for dusting baking sheet)
Recipe:
Place your chuck roast on a lined baking sheet and season all sides with salt, pepper, and a light coating of your BBQ rub. Finely ground spices cover more surface area and can block smoke absorption, so I recommend using coarsely ground salt and pepper and keeping the rub light. Let the meat sit at room temperature for at least 30 minutes so it can absorb the spices.
Insert your meat thermometer (I use a MeatR) into the middle of the roast and then put it on a cold smoker. Turn on your smoker and get it going to 225 degrees—two important things to note about this step. First, cooking times can vary based on many factors, including external temperature, the size/thickness of the meat, the meat’s internal temperature when it goes on the smoker, and more. That is why I always advocate using a probe for a long cook. Second, most smoke absorption occurs during the first few hours of cooking, so starting with a cold smoker allows for maximum smoke absorption and a better bark.
While the chuck roast cooks, start on your buns. Take 95-100 degree water and mix in 1 TBSP of sugar and 1.25 TSP of active dry yeast. Let proof for about 5 minutes, until a nice layer of bubbles has formed.
While the yeast proofs, add 2 cups all-purpose flour, 1-2 TBSP salt, and 2 TBSP butter to the stand mixer.
Add the proofed yeast to the stand mixer and mix until it forms a smooth ball, about 5 minutes. Remove the dough and place it in a bowl wiped down with olive oil. Cover with plastic wrap or press-and-seal. Let it proof for about 1.5 hours.
Line a small baking sheet with tin foil and dust with cornmeal to prevent sticking. When the dough is 2-3x its original size, punch it down and roll it into 4 balls, spaced evenly across the baking sheet. Cover with a towel and proof for another 30 minutes.
Place a baking sheet on the bottom rack of your oven with an overproof ramekin or bowl filled with water and preheat the oven to 375 degrees. The steam from the water will help create a baguette-like crunch to the exterior of your buns, making them hold up better to sauces and toppings.
Once buns have completed proofing, bake at 375 for 25 minutes. Remove from the oven and let cool on a baking sheet.
Melt a few tablespoons of beef tallow in a saucepan over the stove.
Once your roast reaches 180 degrees (about 5 hours), remove it from the smoker and transfer it to a large sheet of butcher’s paper. Cover the roast with melted beef tallow, then wrap it tightly before returning it to the smoker until it reaches an internal temperature of 203 degrees.
Remove the roast from the smoker and place it (still wrapped) in an insulated resting bag, then put it in a cooler. Let it rest for 3-5 hours. Note: If you don’t have a resting bag, it’s perfectly fine to put it straight into a cooler. If that’s not an option either, you can put it in the oven’s warming tray at 140 degrees.
Slice your buns in half, add a little olive oil, and toast.
When resting is complete, slice the roast and assemble your sandwich. Enjoy!